Admin Dashboard Guide
Complete reference for managing your website. Learn how to use every feature of the admin dashboard to build and maintain your site.
Quick Navigation
Getting Started
Learn the basics of accessing and navigating the admin dashboard
Accessing the Dashboard
Navigate to /admin or click the "Admin" link in the navigation menu. You'll need to be logged in with an authorized account.
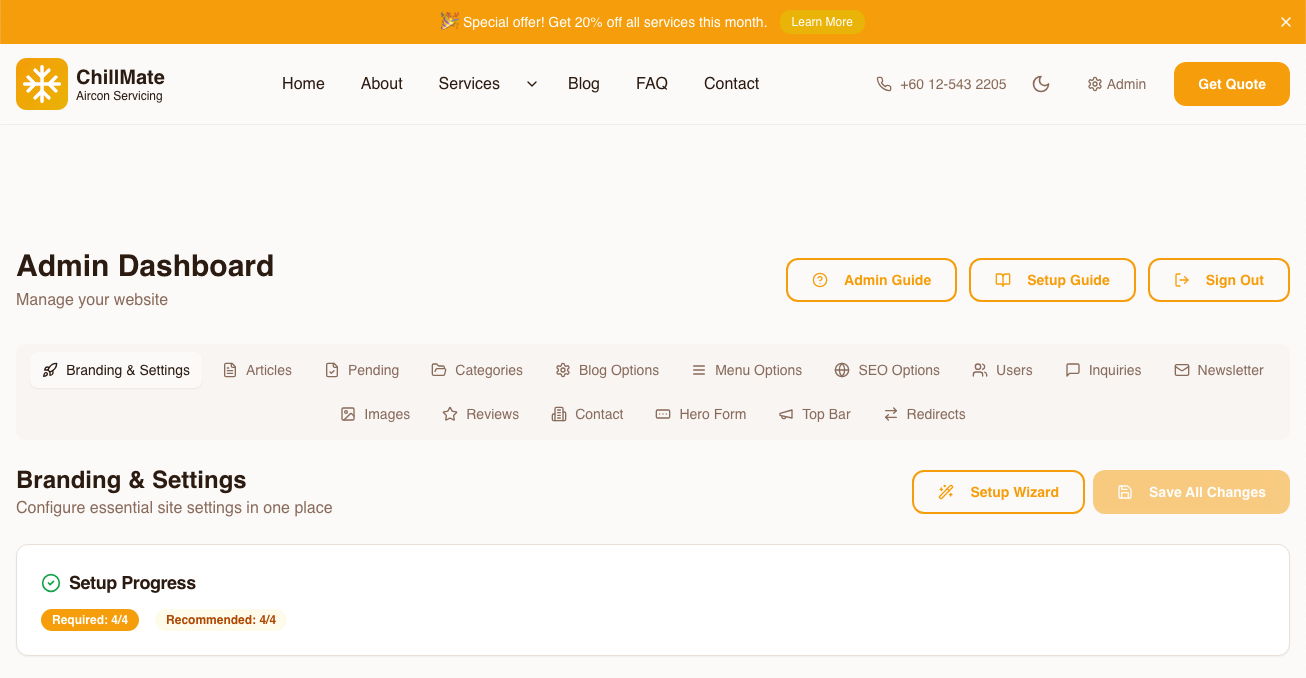
The admin dashboard with main navigation tabs
- 1Quick links to Admin Guide, Setup Guide, and Sign Out
- 2Tab navigation organized by function (Content, Settings, Communications)
- 3Setup Progress tracker showing required and recommended task completion
Understanding User Roles
- • Full access to all features
- • Can publish and delete content
- • Can manage users and roles
- • Can approve pending content
- • Can create draft articles
- • Can edit own unpublished content
- • Cannot publish or delete content
- • Limited to "My Drafts" section
Content Management
Create, edit, and manage articles with powerful tools
Branding & Settings
Customize your site's identity and appearance
SEO Options
Optimize your site for search engines
Forms Configuration
Build and customize forms for your site
User Management
Manage accounts and permissions
The User Management section provides complete control over user accounts.
User Actions
- View all users
- Create new users
- Toggle admin/user role
- Delete users
User Information
- • Email address
- • Display name
- • Email verification status
- • Last activity (relative time)
- • Current role
Screenshot Placeholder
User management table showing users with roles and actions
ID: user-management
User management interface
- 1User list with details
- 2Role toggle switch
- 3Password reset button
- 4Delete user action
Communications
Manage inquiries and newsletter subscribers
Reviews Management
Moderate and feature customer reviews
Manage customer reviews submitted through your site.
Approve
Make reviews visible on the site
Reject
Remove inappropriate reviews
Feature
Highlight on homepage
Dashboard Metrics
View total reviews, pending count, and aggregate rating at a glance.
Screenshot Placeholder
Reviews management showing pending reviews with approve/reject actions
ID: reviews-management
Reviews moderation interface
Image Library
Centralized asset management
The Image Library provides a central location for all your media assets.
Upload Features
- Bulk upload support
- Drag-and-drop interface
- Progress tracking
Management Features
- One-click URL copying
- Multi-select for bulk delete
- Infinite scroll loading
Editor Integration
Screenshot Placeholder
Image library grid showing uploaded images with selection checkboxes
ID: image-library
Image library with multi-select
- 1Upload drop zone
- 2Image grid with selection
- 3Copy URL button
- 4Bulk delete action
Advanced Features
Additional tools for site management
Case Studies
Publishing Your First Article
Step-by-step guide from draft to published
Create New Article
Navigate to Articles tab and click "New Article". Fill in the title, headline, and slug.
Write Your Content
Use the editor to write your article. Switch between Code and Visual views as needed. Add images from the library.
Add Featured Image
Upload or select a featured image from the Image Library. This appears in article cards and social shares.
Set SEO Metadata
Fill in the title tag (max 60 chars), description (max 160 chars), and select a category.
Publish
Toggle the "Published" switch and save. Your article is now live! Add it to navigation using the Articles Navigation Status tool if desired.
Rebranding Your Site
Complete brand update workflow
Update Company Name
Go to Branding & Settings → Branding & Identity. Update your company name, tagline, and slogan.
Choose New Colors
Open Color Theme Manager and select a preset that matches your new brand, or use custom colors.
Generate New Logo
Use the Logo Creator to generate a new logo. It will automatically use your new theme colors.
Update Contact Info
Go to Advanced → Contact Settings and update any changed phone numbers, emails, or addresses.
Refresh OG Image
In SEO Options, capture a new homepage screenshot to update your social sharing image with the new branding.
Managing a Content Team
Multi-user content workflow
Create Writer Accounts
Go to Users tab and create accounts for your writers. Leave them with the default "User" role.
Writers Create Drafts
Writers log in and create articles. They can only save as drafts—publishing requires admin approval.
Review in Pending Queue
As an admin, check the "Pending Approval" section regularly. Review drafts for quality and accuracy.
Edit and Publish
Make any necessary edits, then toggle "Published" to make the article live. The writer can see their published work.
Promote Top Writers
For trusted writers, toggle their role to "Admin" in User Management to give them publishing rights.
Need More Help?
Check out the Setup Guide for initial configuration or explore the admin dashboard directly.